Today we'll add a handful of spikes, and get them to scroll gently across the screen in time with our movement.
We'll use an Array to store their heights, and set their distance based on how far we've scrolled, as well as a general distance multiplier.
We'll then position them onscreen, draw them where needed, and test for collisions with the player.
It should be simple enough, right?
Let's begin by creating a new copy of our project.
.JPG)
Copy and Rename, as per usual. Again, you probably don't have to do this, but I'm creating sub-versions each time, so that you can play with the tutorial as I build it.

Let's start by adding a new Array for our spike's heights, and initially filling it with simple 1's.

1's will appear on the ground, 2's above it, and so on. We'll have to figure out our highest spike heights, later, since it'll depend on a bit of mathematics to work out exactly how high we can go before reaching the top of the screen.
Like we did for the player, we should now add a function to handle the spikes, so call the function from our main loop..

.. and then add a quick function below.

Inside this loop, we'll want to find the correct drawing positions.
The X position is relatively simple.
We multiply our looping number (n) by a gap distance (we'll make this a nice round 200 for now), then subtract the distance we've moved.
It's relatively easy to figure out the X position.

The Y position is slightly quirkier.
First, we start by getting the Ground's position, like we did for the Player. The ground is still the 5th layer of our 64 pixel sized tiles, so the ground is being drawn at 5*64.
Next we take the value of our Spike's Height, and multiply it by an arbitrary number. For our game we'll use 32.
Since the "Spike" sprite is 64 pixels high, it means that each height value increment will move the spike up by "half a spike".
Lastly, we subtract an extra 32.. Remembering that a spike at height "1" will be "Ground - 32", but that the spike is 64 pixels high. We move it up an extra 32 pixels so that the bottom of the spike meets nicely with the floor.

We can now add a simple Drawing method.

At this point, you can Ctrl+S / Ctrl+R your game to test it.
You should find a row of 10 spikes along the floor, which move along as you tap the key.
The basics of the game are in position, but we'll tweak things before moving on.
First, the "200" gap.
It's currently a hard-coded value, but we might want to change it later, so we'll replace the 200 with a global $Gap variable

and set it's value up at the top of the game.

This makes it easier to tweak the values at a later point in the game, as well as making multiple references to the gap without having to remember what value we've set it to.
Wraparound
We're only drawing 10 spikes at a time.Since the screen never shows more than a few spikes at a time, we can get away with such a low number.
It means less drawing, less collision tests, and an overall quicker, smoother game.
If we tried to draw an infinite number of spikes, going on forever, we'd have more than a few issues.
Instead, we'll create a "wraparound"
If a spike is too far to the left, off the screen, we pick it up, and plop it down at the end of the line instead.
This means that, with only a small number of drawings, collisions, and a tiny amount of memory usage (only 10 values!) we can generate huge infinite worlds.
We've slightly tackled wrapping in the past. The "%" function will be our friend, here.
The overall distance we need to wrap is 10*$Gap, since that's the distance between the first and last spike.

However, this will only wrap the number within that limit. If you test the game as it is, now, you'll notice that futher spikes will only appear along the very left of the screen for a brief moment or two.
To counteract this, we need to shift their position further to the right. We'll offset all the Spike drawing by 700 pixels.

The "screen" is only 640 pixels wide, so this is enough that even a spike at "0" will be drawn off the right edge of the screen.
Spikes will have enough space to move into the picture, as well as out.
Give it another go, and you should now find that you can scroll onwards, forever.
Random Numbers
Next up, we need to start shifting some of the spikes around.The path will be random, meaning no two paths are ever the same.
To accomplish this, we simple change the "SpikeHeight" value to a new number.
We should only do this when the Spike is currently off the screen, though.
We'll start with a simple test to ensure it's off the screen.
We previously shifted everything so that it was further off the right hand side of the screen than was necessary. We can use that to tell us when the spike is off the screen.

In here we set a new Spike Height value.
We can use PlayMyCode's "Rand" function to generate random numbers.
Give it a bottom and a top number, and it gives us back a random number inbetween those two values.
1 will be our bottom, and 8 our top.
Why 8?
Maths Time
Our player bounces 200 pixels high, and is 64 pixels tall.. (264)
Our spikes are drawn at 32 pixels height steps. (32)
264/32 = 8.25
If we set a spike at 8.25, technically it's bottom should just about meet up with the top of our ball at full bounce.
So, we generate numbers between 1 and 8, to ensure the spike will always be "hittable".

We should also be aware that the Rand() function is generating floating-point numbers, meaning it won't just be giving us round numbers, but everything inbetween.
Basically, if we use the number it gives us, it could be 1, it could be 1.2858, it could even be 3.4134879. This won't give us the stepped heights we're after.
If, instead, we ask for a "Round()" number, the number we're given back is rounded off to it's nearest whole number. This gives us a much better set of values.

If you give the game a whirl, now, you'll get a lovely spread of random spikes to leap over.
You'll probably find, though, that it doesn't quite have the right feel to it, yet.
There's an awful lot of stop and starting between bounces, and you can't get a good "flow" going.
To counteract this, head to the $Gap variable, and fiddle around with it, until you find a good feel for your game.
You might also like to add $MaxSpeed and $BounceSpeed variables, too, so you can tweak it all at the same time.

Fiddle around with these figures, and keep playing until you get a nice feel to it.
Once you've found a nice "flow", we'll get ready to move onto the next stage in our game.
The Titlescreen
Before we can add "Death" to the game, we need somewhere for the game to go once we're dead.We'll create a titlescreen, and then deal with moving from Titlescreen to InGame and back again.
First off, create a variable to hold whether we're in the game or not.

Next we shuffle our main loop around a little.
Place most of the contents of the main loop, inside a giant "If" statement, so that it only happens when InGame is 1, and then add a second if to deal with the titlescreen.

Inside our titlescreen area, we'll add a simple "Hit the button to start" function, which changes InGame to 1.

As well as this, we'll add a cheap tacky looking "Titlescreen" bit of text on the screen.

It's not much, but it'll do for the moment.

If you run the game now, you'll find that tapping the button will start the game, but the game never ends.
Let's fix that, by killing the player!
Death
In order to test if our two objects have collided, we can use PlayMyCode's "isPixelOverlap" function. This tests whether two images, drawn at specific positions, are touching each other.It should be noted that overusing this function will have a detrimental effect on your game's speed, but we've already ensured that we're only ever going to check 10 spikes at a time. This saves a lot of hassle for this game, but be aware that something like a bullet-shooter type game, with thousands of bullets and enemies and things, probably wouldn't benefit from this type of checking sytem.
We should also be aware that this "Per Pixel" checking system only checks the raw image data. That is to say that our rotation of the Face sprite isn't actually considered when checking for collisions.
We're lucky in that our face is round, so it doesn't actually matter what way around it is, but if you drew anything other than a round object, the collision detection won't be pixel perfect.
I'll let you work out the kinks in that, yourself.
For now, we'll plow on, and add in our simple collision check. (and it IS very simple!!)
We simply test whether the Ball image, drawn at SpikeX and SpikeY, is colliding with the Face image, drawn at PlayerX and PlayerY.
Whenever it does, we'll change InGame to 2.

If you run the game now, you'll get to play it for a brief time, before hitting a spike, and getting stuck in a black screen.
Why the black screen?
Simple. We've set InGame to 2, but haven't told it what to do in that scenario.
Start by adding a third InGame section to our main loop.
Inside here we'll add a "Game Over" display.

Next, we'll add a Ticker.

The ticker gets Delta value added each frame, whilst in the "Game Over" section.
There are 60 "delta" points per second, so once Ticker gets beyond 120 deltas (2 seconds), we switch back to Titlescreen mode.
We also reset the Ticker so that next time it starts from 0 again.

If you run the game, now, you'll notice two things.
One.. The Game Over screen lasts two seconds before resetting to the Titlescreen.
Two.. Once back to the titlescreen, starting the game results in instant death.
Reset
We've not restarted the game properly, yet.Whenever the player starts a game, $InGame might be set to 1, but nothing else is reset.
We should start by resetting the scrolling back to 0.

We can also reset the Bounce to 0, too, so that the Player always starts off in the same orientation.

In the future, we should also use this section to reset the scores, and other such values, but we've yet to tackle the scores, so we'll save that for later..
Reusing Functions
The Game Over screen is currently a little empty looking. Luckily, most of our game is held within functions, so we can quickly and easily reinsert these elements back into different parts of our game.For our Game Over screen, we'll redraw the background, player and spikes, by simply calling up those functions.
Since the actual Movement Control code only happens within the InGame=1 section, our Game Over screen won't be effected by movement, but it will at least draw all of our elements that we need.

You might, however, notice that the white "Game Over" text doesn't always appear nicely against the sprites.

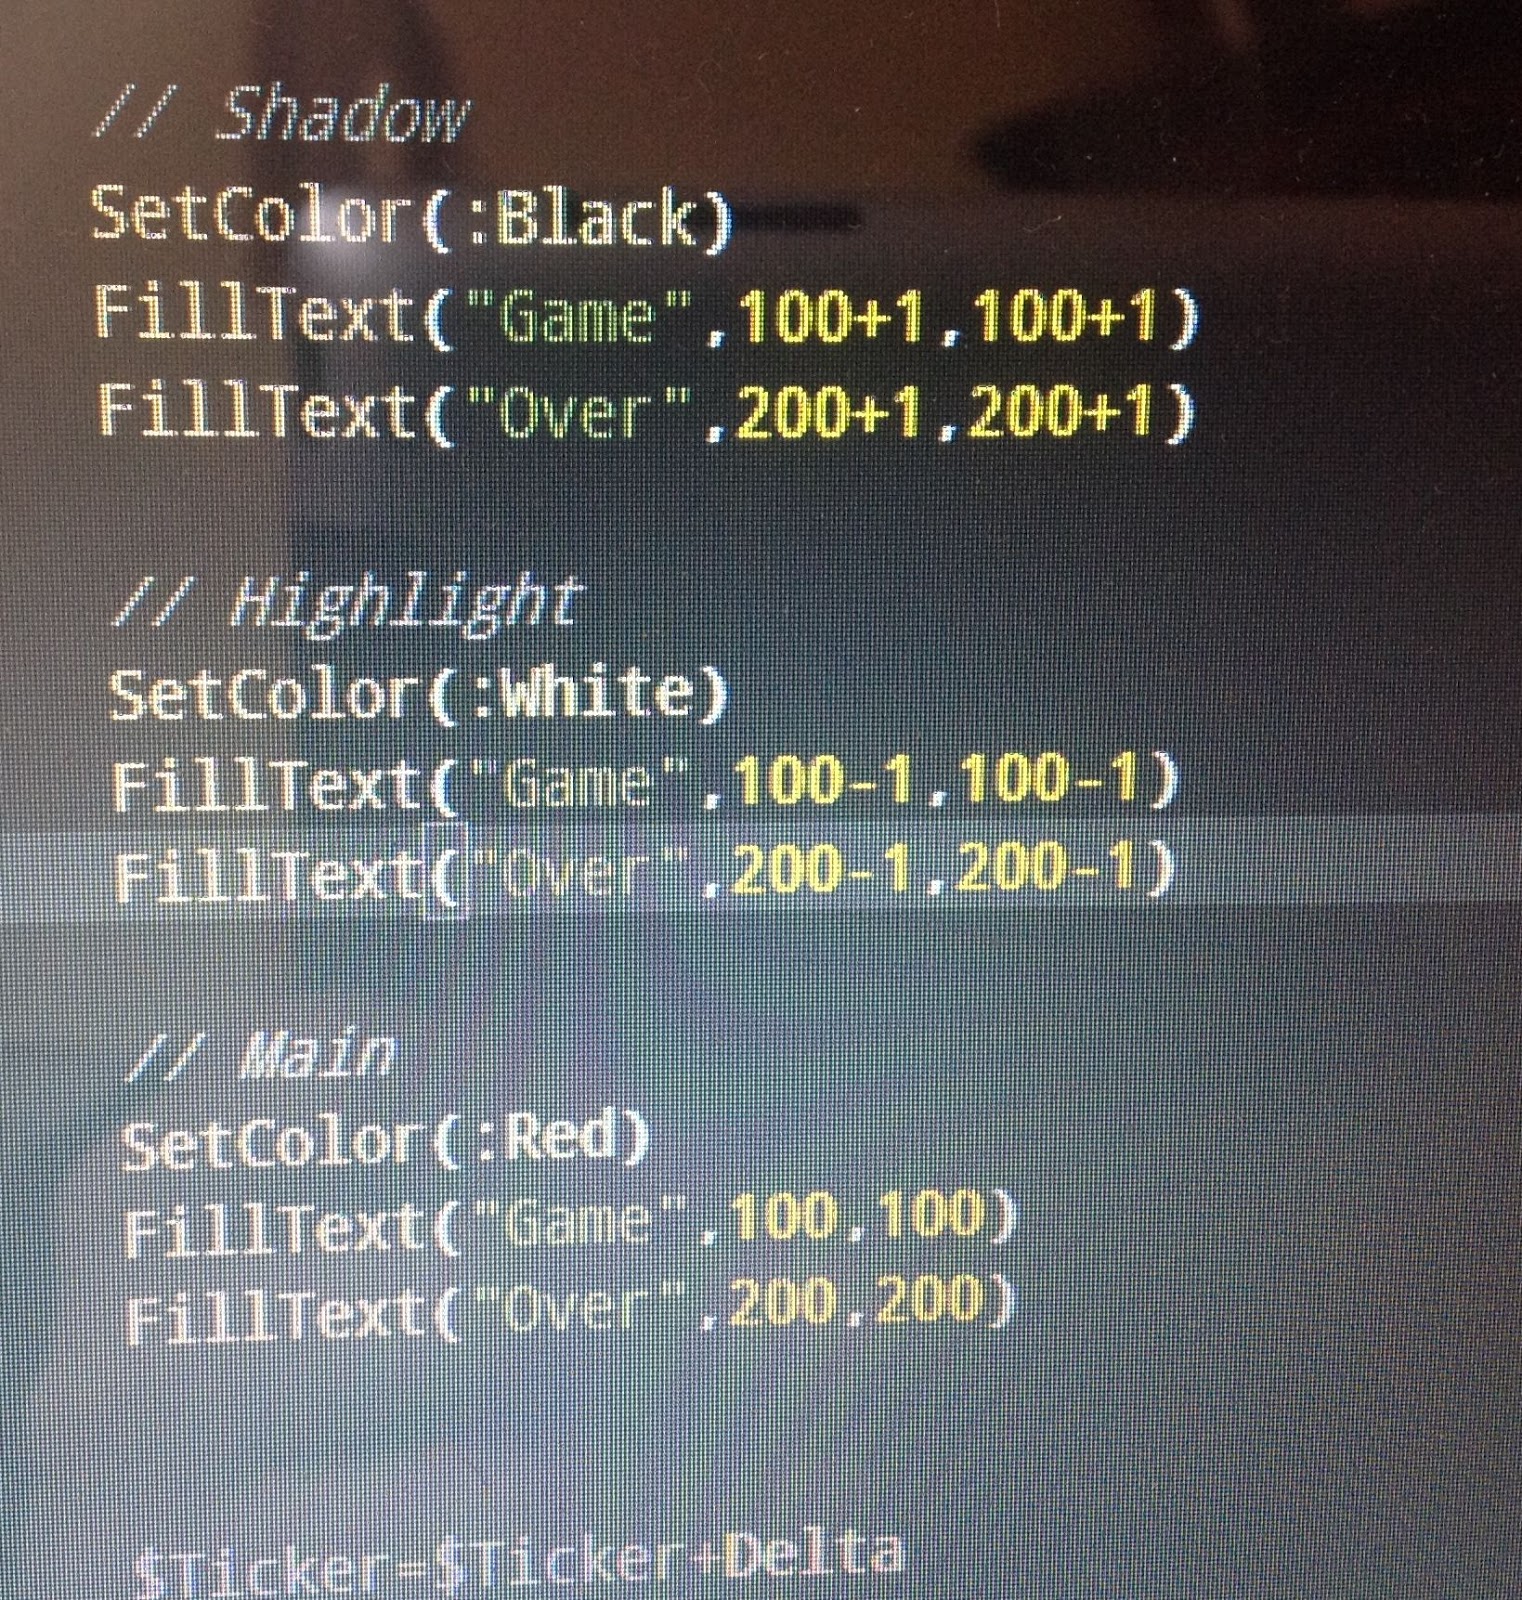
For this reason, we'll redraw out text with three colours.
First, a Black Shadow, then a White Highlight, and third a Red Main colour.
The Black goes 1 pixel down and right, the White 1 pixel up and left, and then Red in the middle.

At this point, you might also like to add a Fade-Out to the screen. We do this by simply drawing a black rectangle over the top of the screen, with an alpha value depending on how far along the $Ticker value is.
Since we know the Ticker ends when it hits 120, and the Alpha should be 0-1, we can do a simple $Ticker/120 to decide on the fade's Alpha value.

Not forgetting, of course, to reset the Alpha back to 1, after we're done drawing the rectangle.
Run the game now, hit a spike, and the Game Over will appear over the top of a gradually fading background.
Lovely stuff!
We've accomplished quite a lot, here, today.
I'm going to leave it there, until next time.
In our next tutorial we'll deal with a few extra bits and pieces, like the scoring mechanism.
We'll also neaten a few bits and pieces of our code up, to keep things more readable, as well as adding a few "Niceness" things to the game.
Join us next time, and keep coding.
Have fun with what we've got so far, and let me know if you make anything fun/silly with it.
You can Play My Code here, and find the rest of this tutorial here.
No comments:
Post a Comment